
Microgreens, greenweed or leafy greens - call them whichever suits your fancy - are essentially young vegetables with a lot of wow-factor!
Microgreens have been gaining popularity recently as a healthy and flavorful meal addition. But what exactly are microgreens? In this post, we will explore the world of microgreens, from their definition to their nutritional value and how to grow and use them daily. Whether you're a seasoned gardener or just starting, microgreens are a fun and easy way to add a nutritional boost to your diet. So, let's dive in and discover what makes microgreens so special!
What Are Microgreens?
Microgreens are edible greens harvested when they are just a few inches tall after the first leaves, or cotyledons, have developed. They are often confused with sprouts or baby greens, but microgreens differ in several ways.
A seed develops into a seedling, a sprout (or shoot). Then it continues to grow until it develops into microgreens, which you can also call leafy greens, greenweeds, baby greens, or, most commonly internationally, microgreens.
First, microgreens are grown in soil or other growing media, while sprouts are typically grown in water. Second, microgreens are harvested when they have developed their first true leaves, while sprouts are harvested after the seeds have germinated but before they have developed leaves. Finally, microgreens are larger than sprouts and have a more complex flavor and texture.
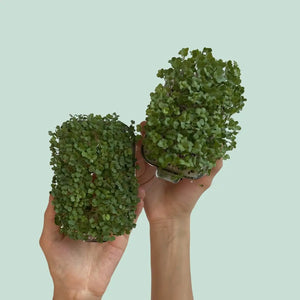
Microgreens come in wide varieties, including arugula, kale, broccoli, and radish. They are often used as a garnish or added to salads, sandwiches, and other dishes to add color, flavor, and texture. The most famous of all microgreens is probably cress, but there are so many more varieties you probably haven't heard of (in microgreen growing form): sunflower, kale, mizuna, buckwheat, arugula, dill, mung beans, red cabbage, radish, fenugreek, chickpeas, field beans, broccoli, incarnate clover, bok choy, red lentils, mustard, chive, and so many more....
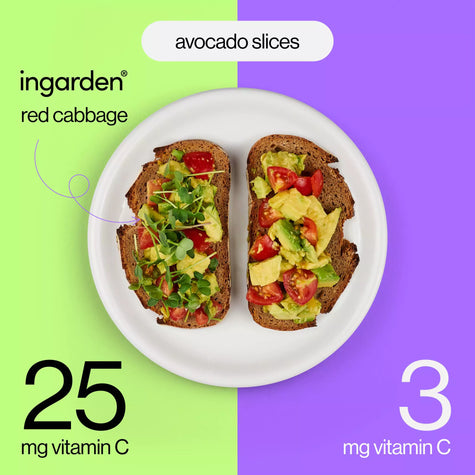
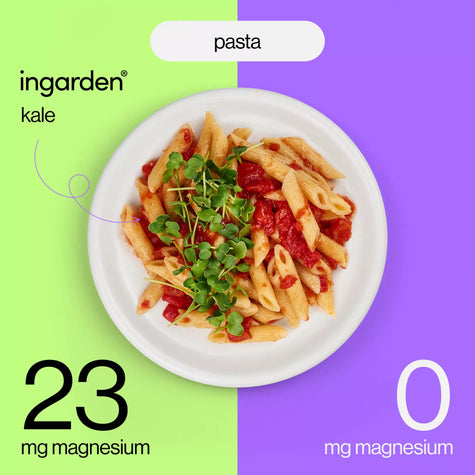
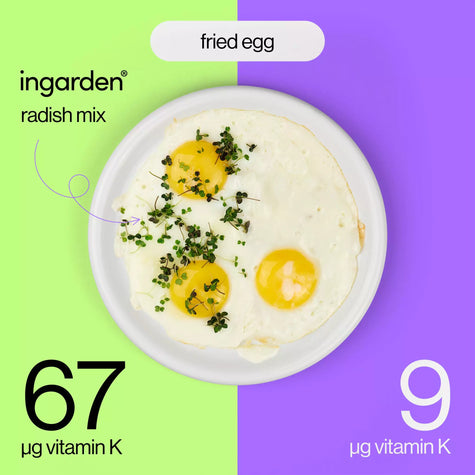
Microgreens are also known for their nutritional value. Studies have shown that they can be up to 40 times more nutrient-dense than their mature counterparts. For example, red cabbage microgreens have been found to contain six times more Vitamin C and 69 times more Vitamin K than mature red cabbage.
Overall, microgreens are a safe, versatile, and nutritious addition to any diet. The next section will discuss how to grow your own microgreens at home.

How to Grow Microgreens
Microgreens can be grown using various methods, each with its own benefits and drawbacks. Some common methods of growing microgreens include soil-based systems, hydroponics, and growing mats.
Soil-based systems involve growing microgreens in soil, which provides nutrients to the plants as they grow. You'll need a tray or container with drainage holes, potting soil, and microgreen seeds to start. Fill the container with a few inches of soil, sprinkle the seeds on top, and cover it with a thin layer of soil. Water the seeds lightly and cover the container with a lid or plastic wrap to create a greenhouse-like environment. Place the container in a warm, sunny location and mist the seeds regularly to keep them moist. Within a few days, the seeds should germinate and grow into tiny plants. Once the plants have a few leaves, remove the cover and water them as needed until they are ready to harvest.
Hydroponic systems involve growing microgreens without soil, instead using water and nutrients to support the plants. This method requires a special tray or container with a system for circulating water and providing nutrients. You'll also need hydroponic-specific seeds, which have been bred to perform well in this type of system. To get started, fill the tray with water and add the appropriate amount of nutrients. Then, sprinkle the seeds on top of the tray and place them in a warm, sunny location. The plants will grow in the water, and you'll need to monitor the nutrient and water levels to ensure they get what they need to thrive.
Growing mats are another popular method of growing microgreens, particularly for home gardeners. These mats are made from biodegradable materials and come pre-seeded with microgreen seeds. To use a growing mat, simply moisten it with water and place it in a tray or container. Then, place the tray in a warm, sunny location and mist the mat regularly to keep it moist. Within a few days, the seeds will germinate and start to grow into tiny plants. Once the plants have a few leaves, they are ready to harvest and enjoy.
Regardless of your chosen method, there are a few key factors to consider when growing microgreens. First, they require plenty of light to grow, so place them in a sunny location or provide artificial light if necessary. They also prefer warm temperatures and high humidity, so keep them in a location with consistent temperature and humidity levels. Finally, be sure to choose high-quality seeds and soil to ensure your microgreens grow into healthy and flavorful plants.

Growing Microgreens at Home
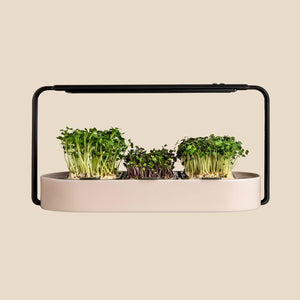
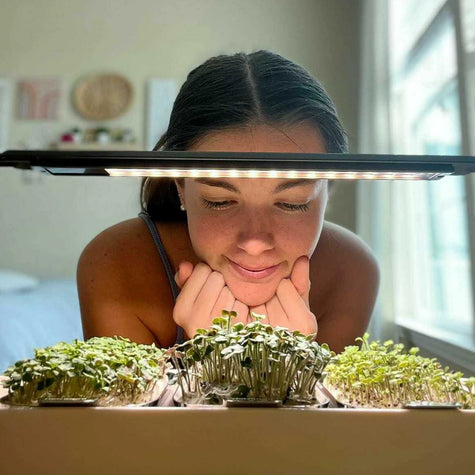
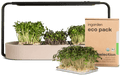
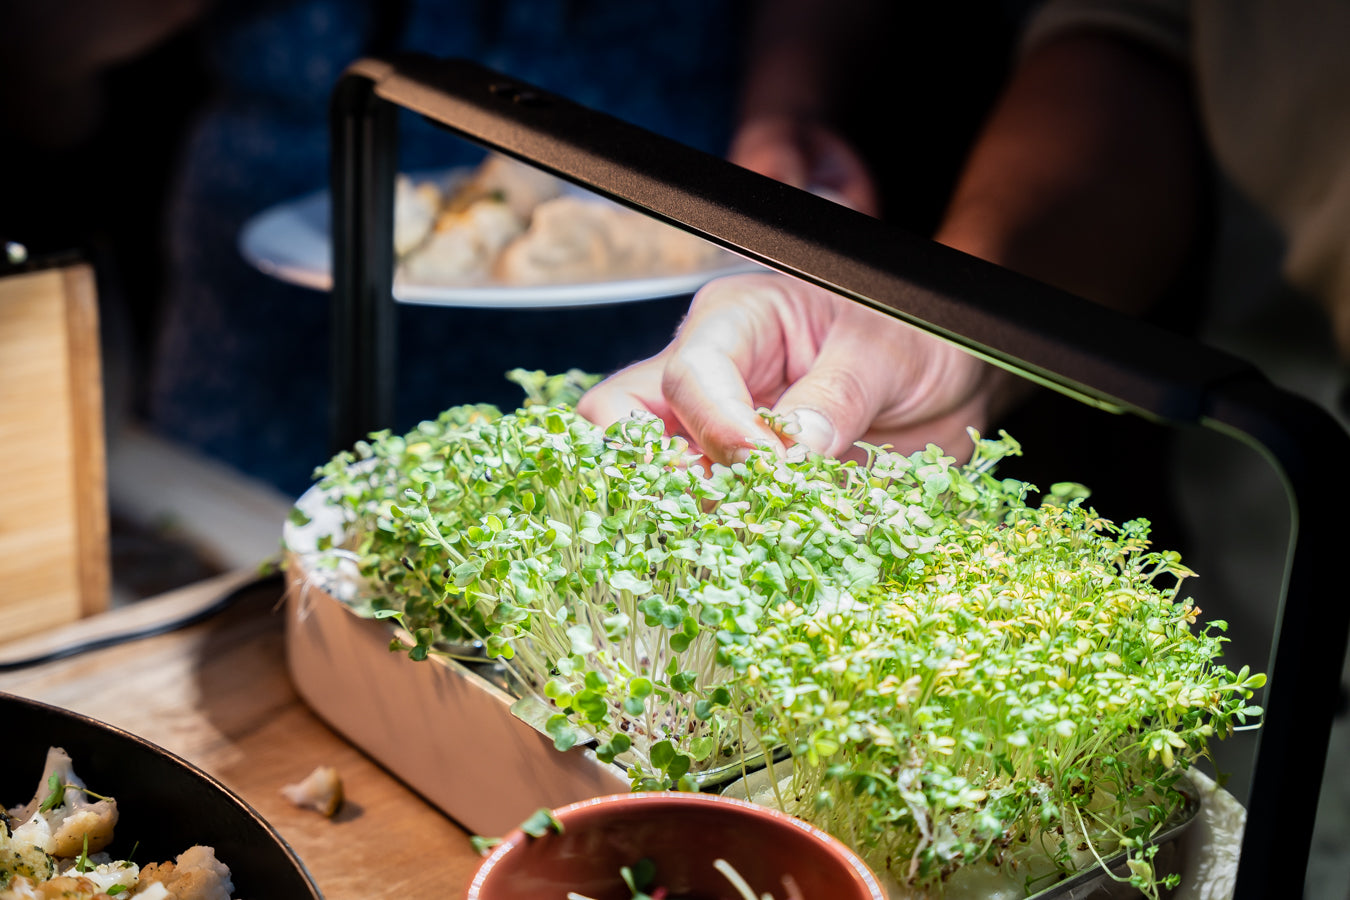
Growing your own microgreens is a fun and rewarding way to add fresh greens to your meals. With a microgreen indoor garden kit, you can grow microgreens year-round right in your own home. Here's how to get started:
- Equipment needed
To grow microgreens, you will need the following equipment:
- Microgreen indoor garden kit: A microgreen indoor garden kit provides everything you need to get started, including a grow tray, growing medium, seeds, and instructions.
- Seeds: You can buy microgreen seeds online or at your local garden center. Be sure to choose seeds that are labeled specifically for microgreens.
- Step-by-step guide to growing microgreens
- Set up your microgreen indoor garden kit according to the instructions.
- Fill the grow tray with the provided growing medium.
- Sprinkle the seeds evenly over the growing medium, carefully not to overcrowd them.
- Cover the seeds with a thin layer of the growing medium.
- Water the seeds gently, being careful not to displace them.
- Place the grow tray in a sunny location or under grow lights if you have them.
- Keep the growing medium moist by watering regularly.
- Watch your microgreens grow! Depending on the variety, they should be ready to harvest in 7-14 days.
- Common mistakes to avoid
Here are some common mistakes to avoid when growing microgreens:
- Overcrowding the seeds: Be sure to sprinkle the seeds evenly over the growing medium and plant only a few seeds in one area.
- Watering too much or too little: Microgreens must be moist but not waterlogged. Be sure to water them regularly, but only a little.
- Not enough light: Microgreens need plenty of light to grow. If you don't have a sunny location, consider using grow lights.
With these simple steps, you can grow your own microgreens at home and enjoy fresh, nutritious greens all year round. The next section will discuss how to harvest and store your microgreens.

Harvesting and Storing Microgreens
Properly harvesting and storing your microgreens is essential for preserving their flavor, texture, and nutritional value. Here's how to do it:
- When to harvest microgreens
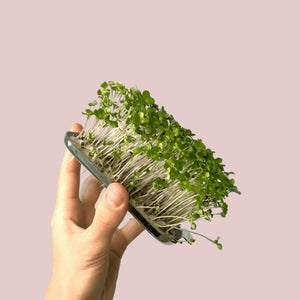
Microgreens are ready to harvest when they have developed their first true leaves, which usually takes 7-14 days, depending on the variety. To harvest your microgreens, use a clean pair of scissors or a sharp knife to cut them just above the soil line.
- Will microgreens continue growing if not harvested?
Microgreens will continue to grow after reaching maturity if they are not harvested. However, once microgreens have reached maturity, they will transition from their vegetative to their reproductive growth stage. This means that the flavor and texture of the microgreens may change, and they may become less desirable to eat.
Suppose microgreens are not harvested on time. In that case, they may become overcrowded, leading to stunted growth, fungal growth, and other issues. It's generally recommended to harvest microgreens when they have reached their optimal size, which is typically between 7-14 days after germination, depending on the variety.
That being said, if you do choose to leave your microgreens to continue growing past their optimal harvest time, you can still use them in salads or other dishes, but they may be less tender and flavorful than when harvested at the optimal time. It's important to monitor the growth of your microgreens closely to ensure that they do not become overcrowded or develop any issues that could impact their growth or flavor.
- Will microgreens regrow after harvesting?
Microgreens are harvested when young and tender, usually within 7-14 days of germination. They are not typically regrown for a second harvest. However, some varieties of microgreens, such as pea and sunflower shoots, may regrow after the initial harvest if the growing conditions are favorable and the roots have not been disturbed.
To regrow microgreens, you can leave a small portion of the plant intact when harvesting and continue to water and care for the remaining portion. Sometimes, you may need to cut back the remaining plant to encourage new growth. It's important to note that the second harvest of microgreens may not be as robust or flavorful as the first, so it's usually best to start with fresh seeds and soil for each batch.
- How to store microgreens
After you've harvested your microgreens, you can store them in several ways:
- In the refrigerator: Place the microgreens in a plastic bag or airtight container and store them in the fridge for up to a week.
- In the freezer: You can freeze microgreens by placing them in a plastic bag and removing as much air as possible. They will keep for several months in the freezer.
- Drying: To dry your microgreens, spread them out on a clean towel and let them air dry for a few hours. Once completely dry, store them in an airtight container in a cool, dark place.
In conclusion, microgreens are a nutritious and flavorful addition to any diet. With a microgreen indoor garden kit, you can grow your own microgreens at home and enjoy fresh, flavorful greens all year round. Following these simple steps for growing, harvesting, and storing microgreens, you can experience the joy of homegrown microgreens in your own kitchen.

Culinary Uses of Microgreens
Microgreens are a versatile ingredient that can be used in a variety of culinary applications. Here are some ideas for incorporating microgreens into your cooking:
- Salads
Microgreens are a natural fit for salads. They add a pop of color, flavor, and texture to any salad. Try mixing them with other greens like lettuce, spinach, or arugula for a flavorful and nutritious salad.
- Sandwiches
Microgreens are a great addition to any sandwich. They add a fresh and crunchy texture that pairs well with all types of meats, cheeses, and bread.
- Soups and Stews
Adding microgreens to soups and stews is an easy way to add extra flavor and nutrition to your meal. Simply sprinkle them on top of the dish before serving.
- Smoothies
Microgreens can also be added to smoothies for an extra boost of nutrients. Try blending them with fruits like strawberries, bananas, and blueberries for a delicious and nutritious smoothie.
- Toppings
Microgreens make a great topping for pizza, tacos, and other dishes. They add a burst of flavor and color to any meal.
- Garnish
Microgreens are a beautiful and flavorful garnish for any dish. Try using them to add a pop of color and flavor to your plates.
In conclusion, microgreens are a versatile ingredient that can be used in many culinary applications. From salads to smoothies, microgreens can add a pop of color, flavor, and nutrition to any dish. Growing your own microgreens with an indoor garden kit allows you to enjoy fresh and flavorful greens all year round.

Are Microgreens worth it to grow yourself?
There are numerous reasons why you should consider growing microgreens at home. Here are just a few:
Health Benefits of Microgreens
Microgreens may be small in size, but they are packed with nutrients and offer many health benefits. Here are some of the benefits of consuming microgreens:
- High in Nutrients
Microgreens are rich in vitamins, minerals, and antioxidants. In fact, studies have shown that they can contain up to 40 times more nutrients than mature plants.
- Boost Immunity
The nutrients in microgreens, such as vitamin C and vitamin E, can help boost the immune system and protect against diseases.
- Reduce Inflammation
Microgreens contain anti-inflammatory compounds that can help reduce inflammation in the body. This can help reduce the risk of chronic diseases such as arthritis and heart disease.
- Improve Digestion
The fiber in microgreens can help improve digestion and regulate bowel movements.
- Lower Cholesterol
Microgreens contain compounds that can help lower cholesterol levels in the blood, reducing the risk of heart disease.
- Aid Weight Loss
Microgreens are low in calories and high in nutrients, making them a great addition to any weight loss diet.
In conclusion, microgreens offer many health benefits and are a great addition to any diet.
Sustainability Impact of Microgreens
- Cost-effective: Buying microgreens at the grocery store can be expensive, but growing them at home is much more cost-effective and you can grow a wide variety of microgreens for the price of just a few store-bought containers.
- Sustainable: By growing your own microgreens at home, you're reducing your carbon footprint and supporting sustainability. Store-bought greens often travel long distances and require packaging and refrigeration, all of which contribute to greenhouse gas emissions and waste.
- Growing microgreens can also help you reduce food waste. Instead of throwing away leftover vegetable scraps or herbs, you can use them to grow microgreens, which are both delicious and nutritious.
Microgreens are Fun to Grow
- Versatility: Microgreens are versatile and come in a wide range of flavors and textures, from peppery arugula to tender broccoli sprouts. This means you can use them in a variety of dishes, from salads and sandwiches to smoothies and stir-fries. For microgreen beginners and newcomers, we recommend growing peas, cabbage varieties (e.g. broccoli, kale, red cabbage) and radishes. these varieties are very low maintenance, easy to handle, and hard to mess up. small microgreen seeds - like the cabbage varieties or radish - are especially quick and easy to grow. you don't have to soak them - except for the peas - before growing.
- Easy to grow: Microgreens are one of the easiest plants to grow at home, requiring minimal space, time, and equipment. With just a few supplies and a sunny windowsill, you can grow fresh microgreens year-round.
- Fun and rewarding: Growing microgreens can be a fun and rewarding hobby, giving you a sense of accomplishment as you watch the plants grow and thrive. It's also a great activity to do with kids, teaching them about the benefits of healthy eating and sustainability. If you want to get your kids involved in the wondrous leafy green growing process right away, we advise you to use varieties with a mild flavor, such as broccoli and kale. broccoli microgreens are mild and crunchy, and kale is mild and sweet. the structure of kale stems and leaves are rather strong compared to other varieties, making them a friendly choice for children to handle.
Overall, growing microgreens at home is a win-win for your health, your wallet, and the planet.
Conclusion
In conclusion, microgreens are a nutrient-dense and versatile form of young plants that can be grown in various settings. They offer numerous benefits for both personal health and environmental sustainability. Growing microgreens at home using an indoor garden kit allows you to enjoy fresh and flavorful greens year-round while reducing your carbon footprint and food waste. We hope this post has helped you understand what microgreens are and inspired you to try growing them for yourself. Thanks for reading!