What is the germination guarantee?
Since we founded ingarden, quality, style, and the functionality of our products have always been our top priorities. Why? Because we haven't seen a smart garden in the world where all three of these factors were met. That's why we started ingarden, to do better. And because it's out of our hands that every single seed pad germinates, we decided to introduce a germination guarantee.
Mariana & Christian
Founders ingarden
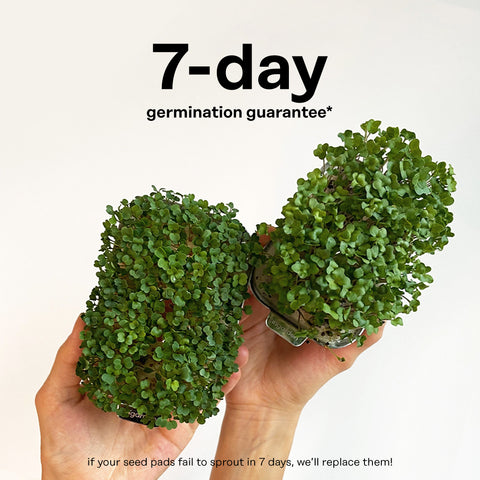
7-day germination guarantee
You have been growing your microgreens for 7 days or more, but one or more pads are not germinating? No problem! Just click through our replacement form.
Fill out the form and get new pads for free.
Please add the following so that we can process your request quickly:
🌱 Order number
🌱 Microgreen variety with germination problems
🌱 A photo of the non-germinated pads
🌱 Optional: description of the problem
ingarden germination guarantee
Frequently asked questions
- This guarantee covers defects in materials, workmanship, and germination of seeds for one year from date of purchase from an authorized ingarden retailer.
- ingarden may replace a non-germinating seed pad with another seed pad of its choosing.
- This guarantee shall not apply to problems arising from: growing in a system other than an ingarden, germination of seeds not provided by ingarden, failure to adhere to starter kit instructions and/or growing guide, improper use, maintenance or storage of seed kit, or use of materials not provided by or recommended by ingarden in or on the plants grown.
- This guarantee excludes all incidental or consequential damages.
Sprouting tips
1. use tap water - not filtered water
Water filters can remove minerals from the water. However, plants need certain minerals, such as phosphates, to grow. If filtered water contains few minerals, this can affect the germination and early growth of plants. The pH value of the water also plays a role. Filtered water can have a different pH value than untreated water, which can affect the germination process. Most plants prefer a slightly acidic to neutral pH value (between 6 and 7). If the pH value of the filtered water deviates significantly from this range, this can affect germination.

2. Do not let your seed pads dry out
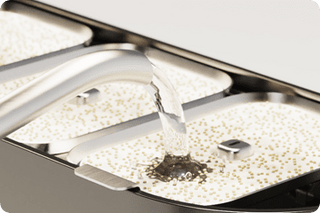
Pour approx. 33 oz of tap water (not filter water) evenly over each pad until the ceramic tray is filled to the brim and the pads are completely soaked. Then you do not need to add any more water until the harvest after 5-7 days. However, keep an eye on the water level if the air is too dry.
If you do not want to harvest the microgreens immediately after 7 days, pour water into the tray from the side. After 14 days at the latest, you should harvest and eat the microgreens or keep them fresh in an airtight container in the fridge.

3. Do not place the ingarden in direct sunlight
ingarden should only be used indoors and works best in shaded locations at room temperature. For best results, do not place your ingarden in direct sunlight or in areas with high temperatures.
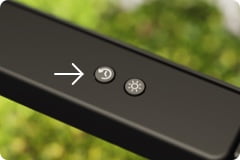
4. Set the timer correctly
For optimum results, we recommend activating the timer. To do this, simply press the timer button (see picture) for 3 seconds until the light goes off briefly and then on again.
Tip: We recommend that you synchronize your ingarden with your personal sleep cycle. Simply start the light cycle of your ingarden when you wake up and it will automatically switch off 12 hours later when you go to sleep
Tap water is excellent for your ingarden, unless your tap water contains large amounts of chloramine, which is used to purify it. You can also use distilled water or spring water.
Depending on the type of microgreens, the optimal temperature for growth is between 15 and 22 °C (60 - 75 °F). Microgreens love an even temperature; that's when they develop the fastest. At higher temperatures, bacteria and fungus can flourish while your seedlings dry out faster. At lower temperatures, the plants can absorb less water and develop more slowly, and you could have problems with mold.
In summer there are some measures you can take to protect your microgreens:
1) Shade and insulation: do not place the ingarden directly in the sun or next to heat sources, and if necessary use reflective materials to protect the plants from too much heat.
2) Air circulation: Ensure good ventilation to move air around the plants and regulate the temperature.
3) Hydration: Check the humidity of the microgreens regularly and water them as needed to avoid overheating.
After each harvest, manually remove the microgreen roots from the wicks under running tap water. Then twirl the wicks before inserting them into the wick holders to prolong wick use and promote transpiration.
ingarden pods are best stored in a cool, dry and dark environment. Our refill packs are designed so that they can be stored optimally and are not exposed to light. This protects the seeds from excessive exposure to light, unwanted moisture or heat damage, which could have a negative impact on yield development. If you have thrown away the packaging, make sure that it is stored in a sealed container that is not exposed to moisture or light.
We recommend cleaning your ingarden device after every harvest to ensure the best microgreen quality and protect from unwanted odor or contamination.
Please refer to this guide on how to clean your ingarden device.
To protect your microgreens in summer, you can take the following measures:
1) Move the ingarden to a cooler, shady place.
2) Use fans or air conditioners to promote air circulation.
3) Make sure that the microgreens are sufficiently watered to prevent overheating.


